Showing posts with label DIY. Show all posts

Easy DIY Happy Sukkot Fall Leaf Garland (Sukkah Decoration Idea)

A banner that reads 'Happy Sukkot' made from yellow leaves is hanging above a wooden cabinet that has brown wildflowers, white pumpkins, an orange pumpkin, and a seven branch menorah. Text overlay reads: DIY Leaf Garland for Sukkot

Here's a very simple, eco-friendly DIY project you can make to decorate for Sukkot this year! Making a fall leaf garland is a quick craft project for the Feast of Tabernacles that can be used to decorate your home, office, church, sukkah, or other temporary dwelling.

Yellow fall leaves are laying on concrete along with blue yarn.


What I love about this fall leaf garland for Sukkot:

-Super simple to make!
-It's very inexpensive since you can easily gather leaves from your yard or a local park, and you can use any kind of string or twine you happen to have.
-Kids can be involved with writing letters or decorating leaves.
-It doesn't last forever. Most of us have more than enough things to store throughout the year. I'm happy for something festive that I can let go of.
-Eco friendly. This is one craft project that doesn't use plastic or things shipped from the other side of the world. When you're finished with it, release your leaves outside or toss them in the compost bin.

A hand is holding up a yellow leaf with an orange letter H written on it.

What you'll need:

-leaves
-string
-tape 
-marker

Yellow leaves are taped to blue yarn


How to make a fall leaf garland for Sukkot:

All you need to do for this is to write letters on individual leaves, spelling out your message. Mine says Happy Sukkot! I used orange marker on yellow leaves from my backyard trees, but you can use any color of marker (black provides more contrast and can be easier to read), and of course whatever particular shades and shapes of leaves suit your fancy. 

Then tape the leaves onto the string. Be sure to give yourself extra room on the ends of the string (I used yarn) so that you can attach them to something in your sukkah, or otherwise hang up, if necessary.

And that's it! The leaves will curl up and dry after a day or two, so this garland doesn't last forever. But it's easy enough that you could remake it throughout Sukkot if you wanted and you could change up the colors and the message itself.

Another option to make your banner last longer is to dip the leaves in beeswax once you have put the letters on and proceed as directed.

Finished fall leaf happy Sukkot banner lays on concrete


Phrases to make:

Happy Sukkot

Happy Tabernacles

Sukkah Time

He's coming to dwell with us

Chag sameach

Happy 8th day

A banner that reads 'Happy Sukkot' made from yellow leaves is hanging above a wooden cabinet that has brown wildflowers, white pumpkins, an orange pumpkin, and a seven branch menorah.


This is a low waste banner! When you're done with your garland it's easy to compost or can be burned.

More ideas for the Feast of Tabernacles:
DIY Happy Sukkot Pumpkin Candleholders
Biblically Clean Campfire Recipes for Tabernacles
Inspiration for Your Sukkah

DIY Pumpkin Candleholders for Sukkot (Feast of Tabernacles Sukkah Decoration Craft)

Photo is a campfire in the background with a candle in a pumpkin in the foreground that says 'Happy Sukkot' - text overlay reads Easy DIY Pumpkin Candleholder for Sukkot | Land of Honey


Here's an easy craft to make to decorate for the Feast of Tabernacles or to spread Sukkot joy to a loved one...DIY pumpkin candleholders! They make for great sukkah decorations, or decor for your home, and they can also be a simple hostess gift during the fall Biblical holiday season.

They are easy to make, and kids can help to decorate them however they'd like. I wrote a simple 'Happy Sukkot' on the one in the picture, but of course you could use other Feast of Tabernacles greetings or Bible verses. You could also paint the pumpkins or decorate them with stickers if you're inclined. Here's how to make them. They really are very simple and can be done quickly!

Five small orange pumpkins are on a table along with a knife, pen, marker, and several tea candles.


You will need:
Mini pumpkin
Tea candle
Pen
Knife
Spoon
Marker

Photo is a small circle drawn on top of an orange pumpkin. A pen and small white candle are also on the table.


Break off as much of the stem as you can. This will make it easier to trace. Place a tea candle on top of the pumpkin, roughly in the middle. Trace around this with your pen (it doesn't have to be exact - but it will give you an idea of where to cut). Then carefully cut around this circle, and remove the pumpkin skin so that you're left with a small crater. Clean any seeds or debris out with the spoon. See if the tea candle fits inside. If it doesn't, use the spoon (or knife, if necessary) to scrape out more pumpkin until the cavity can hold the tea candle.

Insert the candle into the pumpkin. I take the candles out of the thin tin cups they come in and insert just the wax part into the pumpkin. That way it can simply be tossed into a fire or compost bin after being lit and used up.

Discard or compost the stem and any scrapings of pumpkin innards.

A small orange pumpkin with it's stem and core sitting loose on top. You can see tea candles and more pumpkins in the background.


Use markers to write, "Happy Sukkot," or similar festive greetings, on the outside of the pumpkin. Other ideas you could write include:

Happy Tabernacles!
He is with us.
Welcome to our sukkah.
Sukkot: it's in tents.
I am coming to dwell among you. -Zechariah 2:10

A white tea candle sits inside a small orange pumpkin. More pumpkins and tea lights are behind it.


These will keep for a few days in cooler weather. If it's warm in your area, you can also store them in the fridge before use to extend their shelf life a bit. They are a simple decoration for the Feast of Tabernacles and also make a nice gift for friends celebrating the Biblical holidays. If the cutting is done ahead of time, you can have kids add the candles and decorate the pumpkins as a craft for Bible school or as part of a Sukkot gathering activity.

I made these for Tabernacles but they can also be used to decorate for the Feast of Trumpets or Yom Kippur!

A group of small orange pumpkins. Several are carved to hold white tea candles. One says happy Sukkot!


More posts like this:
Everything You Should Know about the Feast of Tabernacles
Eight Day of Activities for the Feast of Tabernacles
Sukkot Scavenger Hunt Game!

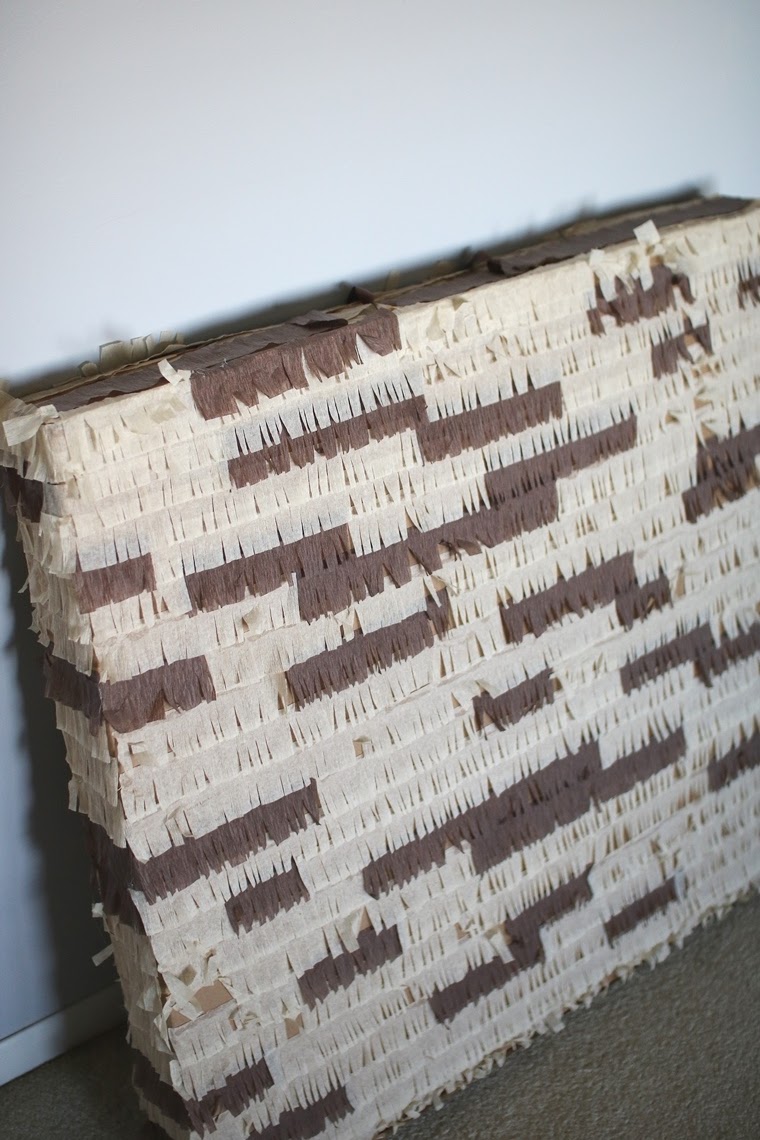
Make Your Own Unleavened Bread Pinata

How to make an unleavened bread pinata for Passover and the Biblical holidays - fun DIY project | Land of Honey


This simple DIY project will add some fun to your household during Passover and the Feast of Unleavened Bread! While all of the Biblical holidays are spiritually significant times, they are also times of celebration and joy. Don't be afraid to do some things that are just for fun to commemorate these times of our Creator. Making this pinata can be a good activity during the week of Unleavened Bread, or do it ahead of time for decoration. Filled with candy, stickers, or small toys it would make a memorable highlight for a congregational or group celebration of Passover or Unleavened Bread.

How to make your own Unleavened Bread Pinata for Passover | Land of Honey


What you need to make an Unleavened Bread pinata:

-a thin, square cardboard box (mine was about 33 inches square, and four inches thick, but feel free to make it smaller)
-hot glue gun and glue sticks
-cream and brown crepe paper
-ribbon
-candy, stickers, toys or other small prizes

How to make your own Unleavened Bread Pinata for Passover | Land of Honey

To make the pinata:

If you're filling it, carefully cut a small opening in a side or the top. It just needs to be large enough for you to put in your candy and prizes if you're doing that. Fill roughly halfway with goodies, then tape over the hole before proceeding.

Cut fringe into the bottom half of your crepe paper. Starting at the bottom of the box, hot glue strips of the crepe paper to the box. Mixing up the cream and brown paper is what makes this pinata resembled boxed matzo. Once the bottom is done, hot glue the next strip just above it so there is no box exposed between the two layers. Do this all the way to the top and then work on the sides and back. While this process is straightforward, it can get repetitive (especially if you are using a large box), so this is a great time to enlist help from your kids or be sure to put on some music or a teaching.

When you get to the top, hot glue a two-foot ribbon on both ends to the middle of the box. This is what you'll use to hang the pinata from, if you wish to hang up for decoration or for whacking down to get at the prizes. Consider the weight of the prizes and reinforce the ribbon with extra glue or tape if needed.

How to make your own Unleavened Bread Pinata for Passover | Land of Honey


There you have it: a piece that's sure to get everyone smiling at your Unleavened Bread celebrations! This is easy to make, with inexpensive materials that aren't hard to find and are environmentally friendly. Even if you're not up for bashing in all of your hard work this is still a fun decoration or photo prop!

How to make your own Unleavened Bread Pinata for Passover | Land of Honey


Related posts:
Celebrating the First and Last Days of Unleavened Bread
Kids Crafts for Passover, Unleavened Bread, and First Fruits
In Remembrance of the Messiah - Passover Pictures

Sukkah Inspiration for the Feast of Tabernacles

Sukkah Inspiration - lots of ideas for temporary dwellings for the Feast of Tabernacles | Land of Honey

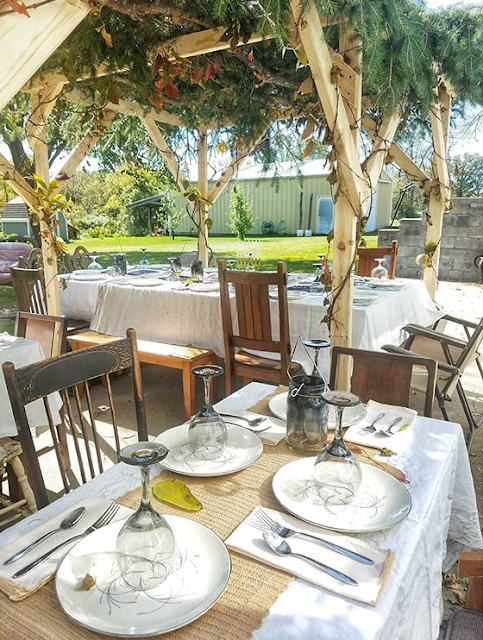
Who needs ideas for their temporary dwelling? Scripture instructs us that during Sukkot or the Feast of Tabernacles we are to live in temporary dwellings or booths (Leviticus 23:42). While Judaism has many, many rules for how a sukkah should look and be, Scripture doesn't give specifics. So I have no doubt that YHWH expected us to each put our own spin on how we keep this commandment. I love getting to share sukkahs from several different feast keepers so you can see the range of possibilities. Your temporary dwelling could be a tent or a camper or a homemade canopy. Hopefully this inspiration sparks and idea that is doable for you.

Dinner party in the sukkah! | Land of Honey
From @blooming_light - What a pretty set up for a Sukkot dinner party! Simple two by fours can definitely be dressed up to look elegant.

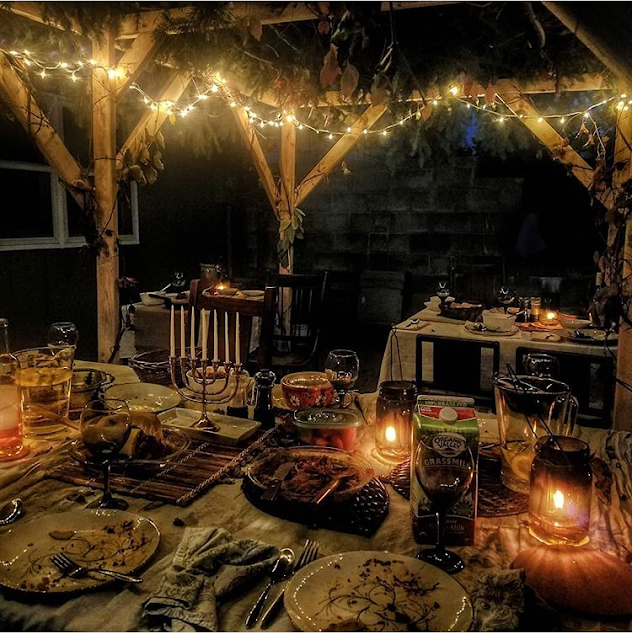
Sukkot dinner party - ideas for the feasts | Land of Honey
From @blooming_light - After the party!

Simple and Elegant Sukkah for the Feast of Booths | Land of Honey
From @elysamary - The lights add such a festive touch to this elegant sukkah!

DIY Yarn Sukkah for Sukkot - easy sukkah ideas | Land of Honey
From Land of Honey - This is my yarn sukkah from a few years back. The structure is really easy to do. The yarn takes a little persistence but is definitely doable, or you could put curtains or a tarp up to make more protective walls.

Ideas for Sukkot | Land of Honey
A friend send me this picture of a more traditional sukkah in Rittenhouse Square in Philadelphia. You can get kits for sukkahs similar to this.

A small sukkah made from items you have around - easy Sukkot DIY project | Land of Honey
Another friend made this using the structure from an old swing set, and then some furniture and decor that she had. It looks like a great place for Bible study!

Beautiful temporary dwelling for Sukkot | Land of Honey
From @taliacarbis of The Climbing Tree - I love that she took comfy furniture and a rug (a plant even!) to make this temporary dwelling more like home. These touches make for an inviting atmosphere for your friends and family to spend time in.

Beautiful temporary dwelling for Sukkot | Land of Honey
From @taliacarbis of The Climbing Tree - Decorative touches like Talia's pomegranates can be a great activity for kids or yourself.

Inspiration for Sukkahs for the Feast of Tabernacles | Land of Honey
From Land of Honey - See the whole post for this here. It's made out of bamboo rods and thrifted curtains.

Woodsy Inspiration for Sukkahs for the Feast of Tabernacles | Land of Honey
From @blooming_light - Here's a woodsy temporary dwelling made from tree branches and pine boughs.

Woodsy Inspiration for Sukkahs for the Feast of Tabernacles | Land of Honey
From Asherah Cinnamon, displayed at the Oregon Jewish Museum Sukkah exhibit in 2014 - the branches in this one are so pretty!

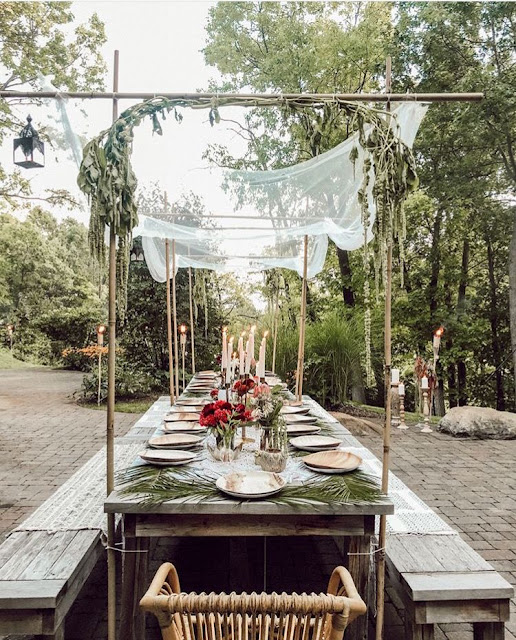
Beautiful dinner setting to celebrate Sukkot | Land of Honey
From Love Sarah Schneider - I love the idea of a canopy right over the table! Absolutely beautiful for a Sukkot dinner party or Scripture study.

A big thank you to everyone who allowed me to share their work and photos; you guys are inspiring others to keep the feasts of YHWH! #sukkahgoals for sure!

More sukkah inspiration here. And here.

DIY Shavuot Cupcake Toppers


Pin It

Here's a simple way to add some Shavuot festivity to your upcoming feast! You can make these at home in just a few minutes. You probably have everything required. Just some tape, wooden skewers or toothpicks, and the printout of these cupcake toppers is all you need. I intentionally made it something that would print out well on a regular home printer using plain paper. Nothing fancy needed at all.

You will need:
Shavuot cupcake printable
Scissors
Double sided tape
Small wooden skewers or toothpicks


What to do:
First you'll need to cut out the hexagons. This shape makes it easy to cut and get nice edges. You will need two per cupcake topper, so print the appropriate number of sheets. One sheet will get you six toppers.

Flip over one hexagon and place a skewer in approximately the middle. Use double sided tape to secure it and then grab another hexagon. Connect the backside of it with the double sided tape. You may want to experiment with different skewer sizes to come up with a height that you prefer. And voila, you have your topper. Repeat as many times as you'd like and you're finished!


Use these to top cupcakes or dessert. Or use as you would toothpicks for snacks or appetizers at your Shavuot celebration.


Looking for a dessert idea to make? Try these milk and honey recipes for Shavuot!

DIY Shavuot Basket

DIY Shavuot Basket | Land of Honey

Pin It
Here's a fun and super simple DIY that you can make for Shavuot!

A lot of you have said that you have trouble finding decorations for the feasts - here's something that you can make for just a few dollars in about fifteen minutes. If you don't have a basket at home to use, head to a thrift shop. Each one I go to is always well stocked with baskets and they are rarely more than a few dollars. I found mine for 50 cents. Since you'll be painting it, the color doesn't matter. Just find a size and style you like. 

DIY Shavuot Basket | Land of Honey

You can use this DIY Shavuot basket for decoration or for gifting a few treats to your kids or a friend. And speaking of gifts, does anyone give presents for any of the festivals? To me Shavuot is a great time to do that, if it's your thing. Since it's only a one day celebration, there's a lot less to do, plus you don't have to worry about cleaning the leaven out of the kitchen, like for Matzah Week, or packing up to go somewhere for Sukkot. So gift giving can be a way to make Shavuot fun and special. Of course, you don't have to give gifts and there's a lot of other things you can use this basket for if you decide to keep it for yourself.

DIY Shavuot Basket | Land of Honey

You will need:
Basket (mine is about eight inches across and eleven inches high)
Craft letters (mine are about an inch and a half high. I think refrigerator magnets would work too)
Glue gun
Spray paint

DIY Shavuot Basket | Land of Honey

Place your basket on its side and then set the letters around the handle to get a rough idea of placement. Start with your V (since it's the the middle letter of Shavuot), and place it approximately in the center of the handle to help with symmetry. Space the letters as close or far apart as you wish. You can use a marker to dot the handle where each letter will go.

Once you know where your V is going, use hot glue to attach the bottom of the letter to the basket handle. Since the bottom of the letter has a pretty small surface area you will want to hold the letter in place for 20 or 30 seconds to make sure it stays where you want it. Once your first letter is secure move on to the next. I worked from the inside out adding the letters to help with the symmetry. 

DIY Shavuot Basket | Land of Honey

When you have all of the letters on for Shavuot, let it dry a few minutes to make sure your glue is set. Then you're ready to spray paint it in the color of your choice. I used coral. Check the directions of your spray paint for approximate drying time. I let mine dry overnight.

DIY Shavuot Basket | Land of Honey

And voila - you have a Shavuot basket! Fill these with treats for the kids or a friend. You could also use this as a bread basket for serving or to hold cards or favors at a Shavuot get together. Or fill with muffins or fruit for a friend. 

Feel free to use a bigger or smaller basket depending on what you're planning on doing with this. Obviously, you could use this DIY for any other holiday as well.

DIY Shavuot Basket | Land of Honey

Gifts in my basket:
Ten Commandments Gummies
YHWH Echad Pin
Pins and stickers from Walk in Love
Ruach and Roll sticker
Yahweh Bracelet

Other ideas:
Sidewalk chalk
Craft supplies
Matchbox car or small toy
Seed packets
Necklace or bracelet
Menorah ring dish
Candy or chocolate
Dried fruit
Bubbles
Doodle Portions Coloring Book

DIY Shavuot Basket | Land of Honey


DIY Shavuot Basket | Land of Honey

DIY Shavuot Basket | Land of Honey

Passover Giveaway from Torah Sisters

Passover invites and cards giveaway | Land of Honey

Hey hey, we've got a Passover giveaway! Amy from Torah Sisters just came out with a brand new set of Passover greeting cards and invitations and she is generously giving away a PDF set along with a Doodle Portions Coloring Book to a Land of Honey reader. Thanks Amy for the fun giveaway! Be sure to get entered at the bottom of this post. :)

I love that the Passover cards/invites are beautiful! These cards do justice to showcasing Passover as a set apart time of YHWH. Four designs are included with matzah and fresh flowers featured on each. Different wording is available for two of the designs, and she even included a blank option for you to write your own message if that works better for you.


Win Passover cards and a Torah Portions coloring book | Land of Honey

Not hosting a Passover gathering? These printables are multi purpose. Use them as cards to wish friends and family happy Passover or decorate around your home with them. As a child, receiving cards was always a marker of a special time for me, so I especially like the idea of putting these in the mail. It's a great way to communicate to others the significance of this time of year and that you're thinking of them. They are designed to be folded in half, so you can print them on regular 8 by 11 paper and end up with a blank card. I trimmed mine in more of a post card style, where you can put a note on the back.

The winner will also receive Torah Sisters' Doodle Portions coloring book! This would be the perfect way to occupy the littles at Seder or just a fun treat for yourself during Unleavened Bread week. Amy also created a free Passover busy book that will entertain the kids and teach them about the Passover story.


Giveaway: Greeting cards and invitations for Passover | Land of Honey

Get entered to win below! Just to be clear, both prizes are for digital files that you can print at home or take to a print shop. This ensures that you will receive them in plenty of time before Passover!

Be sure to visit Torah Sisters store and let us know what your favorite item is for extra entries! While you're there don't forget about the free Passover goodies Amy offers including the Passover busy book for kids, the Gospel Centered Haggadah, and omer counters!

Deadline to enter is March 22 at 12:00am eastern time. 

a Rafflecopter giveaway

DIY Menorah Ring Dish

How to make your own menorah ring dish from air dry clay | Land of Honey
Pin It

I have a fun and easy DIY project for you today! It seems as though we are overdue for a good DIY, the last one here was the Ten Commandments Gummies and before that it was matzah jewelry for the Feast of Unleavened Bread

As you've probably noticed, box stores and mass retailers are not exactly packed with things that represent the Hebrew faith. You won't find many menorahs or Happy Passover banners or Torah portion chalkboards readily available for purchase, so making an item for a feast or just faith encouragement is often the best option. (Though I am super happy to report a growing number of small businesses are making Hebrew minded items!) It's nice to have a few items in your home or workplace to remind you of your faith even when you aren't sitting down to study Scripture or getting ready for a formal Shabbat service. This ring dish does just that, while being lovely and functional.


How to make your own menorah ring dish from air dry clay | Land of Honey

Making this is a pretty straightforward process.

You will need:
air dry clay
rolling pin
knife or cookie cutter
bowl
menorah (this is what I used)
spray paint

How to make your own menorah ring dish from air dry clay | Land of Honey

Roll the clay out to about 1/8 inch thickness. You want this to be pretty even but it doesn't have to be perfect. Then cut out a circle, using either a large cookie cutter or set a bowl (or other round object) on your clay and use a sharp knife to cut along that.


DIY Menorah Ring Dish | Land of Honey

Once you have your circle you'll need your menorah. If you follow me on Instagram, you'll recognize my small metal menorah from various photos. That's what I used for this ring dish but there are other options you could use too. Simcha Central's menorah cupcake toppers would also work, as would a stamp like this, or a fondant cutter. You could also press lightly with a menorah cookie cutter to imprint the design but don't go all the way through.

Position your menorah how you would like it and then lightly press to leave an impression in the clay. I used the rolling pin to apply even pressure and it worked well. There can be some trial and error to this, so if you aren't happy with how it's looking just start again. :)


DIY Menorah Ring Dish | Land of Honey

If you're happy with that it's time to shape into a bowl (if you're not just re-roll the clay and start over). I used the same bowl I cut my circle from earlier to shape my dish. Just center it on the bottom and gently contour the edges around the sides. How you have it now will be the final shape of your dish, so don't stop until you are pleased. Keep your clay dish on the bowl as it dries. Check the package directions of your clay for how long this should take. I let mine dry overnight.


How to make your own menorah ring dish from air dry clay | Land of Honey

Once your dish feels completely dry to the touch, gently remove it from the bowl and you'll have something like this. So fun, right?!


DIY Menorah Ring Dish | Land of Honey

I spray painted mine in a metallic gold but you could obviously use any color of spray paint. Or you could paint just the menorah and the rim. Or leave as is if you like. My air dry clay was white but there are some colored options as well. You could even try for a marbled effect with a couple of colors. It's totally up to you!


DIY Menorah Ring Dish | Land of Honey

This has been my ring dish for a few months now and I love the pretty reminder of YHWH's presence and Kingdom. It's also very functional to always know where my wedding ring is if I am not wearing it. It's held up very well; I was concerned the paint may scratch off but so far it has not. These dishes also work to hold keys or spare change. They could be used as place card holders for Passover or another feast...how fun would that be?

DIY Menorah Ring Dish | Land of Honey

PS - If you decide to try making a menorah dish, use your leftover clay for matzah jewelry! :)

Get ready for the fall feasts

The Beginner's Guide to the Feast of Trumpets

Taking part in the Creator's appointed time of the Feast of Trumpets is an option for you, even if it's not something you have ever ...