Showing posts with label craft. Show all posts

DIY Menorah Ring Dish

How to make your own menorah ring dish from air dry clay | Land of Honey
Pin It

I have a fun and easy DIY project for you today! It seems as though we are overdue for a good DIY, the last one here was the Ten Commandments Gummies and before that it was matzah jewelry for the Feast of Unleavened Bread

As you've probably noticed, box stores and mass retailers are not exactly packed with things that represent the Hebrew faith. You won't find many menorahs or Happy Passover banners or Torah portion chalkboards readily available for purchase, so making an item for a feast or just faith encouragement is often the best option. (Though I am super happy to report a growing number of small businesses are making Hebrew minded items!) It's nice to have a few items in your home or workplace to remind you of your faith even when you aren't sitting down to study Scripture or getting ready for a formal Shabbat service. This ring dish does just that, while being lovely and functional.


How to make your own menorah ring dish from air dry clay | Land of Honey

Making this is a pretty straightforward process.

You will need:
air dry clay
rolling pin
knife or cookie cutter
bowl
menorah (this is what I used)
spray paint

How to make your own menorah ring dish from air dry clay | Land of Honey

Roll the clay out to about 1/8 inch thickness. You want this to be pretty even but it doesn't have to be perfect. Then cut out a circle, using either a large cookie cutter or set a bowl (or other round object) on your clay and use a sharp knife to cut along that.


DIY Menorah Ring Dish | Land of Honey

Once you have your circle you'll need your menorah. If you follow me on Instagram, you'll recognize my small metal menorah from various photos. That's what I used for this ring dish but there are other options you could use too. Simcha Central's menorah cupcake toppers would also work, as would a stamp like this, or a fondant cutter. You could also press lightly with a menorah cookie cutter to imprint the design but don't go all the way through.

Position your menorah how you would like it and then lightly press to leave an impression in the clay. I used the rolling pin to apply even pressure and it worked well. There can be some trial and error to this, so if you aren't happy with how it's looking just start again. :)


DIY Menorah Ring Dish | Land of Honey

If you're happy with that it's time to shape into a bowl (if you're not just re-roll the clay and start over). I used the same bowl I cut my circle from earlier to shape my dish. Just center it on the bottom and gently contour the edges around the sides. How you have it now will be the final shape of your dish, so don't stop until you are pleased. Keep your clay dish on the bowl as it dries. Check the package directions of your clay for how long this should take. I let mine dry overnight.


How to make your own menorah ring dish from air dry clay | Land of Honey

Once your dish feels completely dry to the touch, gently remove it from the bowl and you'll have something like this. So fun, right?!


DIY Menorah Ring Dish | Land of Honey

I spray painted mine in a metallic gold but you could obviously use any color of spray paint. Or you could paint just the menorah and the rim. Or leave as is if you like. My air dry clay was white but there are some colored options as well. You could even try for a marbled effect with a couple of colors. It's totally up to you!


DIY Menorah Ring Dish | Land of Honey

This has been my ring dish for a few months now and I love the pretty reminder of YHWH's presence and Kingdom. It's also very functional to always know where my wedding ring is if I am not wearing it. It's held up very well; I was concerned the paint may scratch off but so far it has not. These dishes also work to hold keys or spare change. They could be used as place card holders for Passover or another feast...how fun would that be?

DIY Menorah Ring Dish | Land of Honey

PS - If you decide to try making a menorah dish, use your leftover clay for matzah jewelry! :)

DIY Ten Commandment Gummies

How to make your own Ten Commandment Sour Gummies for Shavuot | Land of Honey

These ten commandment gummies are a perfect treat for Bible school, Passover, or any of the Biblical holidays! Made with beef gelatin, they are Biblically clean and kosher, and you can use most any type of fruit or juice to make them. Use these to teach kids about Moses and the giving of the ten commandments, or as a healthy treat to enjoy at Shavuot or the Feast of Tabernacles.

How to make your own Ten Commandment Sour Gummies for Shavuot | Land of Honey

The secret to this lies in the awesome candy mold used to make these into the commandment tablets. I found this one and love it! You'll notice that it has the first ten letters of the Hebrew alphabet - each letter stands for one of the ten commandments given by YHWH to Moses in Exodus 20, right near the time of Shavuot. Since we celebrate the giving of the written Word and the Ruach HaKodesh writing his Word on our hearts at Shavuot this is a perfect treat for this time of year. You could make them together as a family or surprise someone with a gift of real food, kosher sour gummies.

DIY Ten Commandment Gummies for Shavuot | Land of Honey

These are simple to make and they should work with any real food 'gummy' recipe out there, just be sure to use kosher gelatin! I used Great Lakes grass-fed beef gelatin but you could certainly experiment with agar agar as well. My candy mold holds just over half a cup of liquid. As you can see, these recipes will make for a bigger batch than that. I experimented with halving the recipes but found with that little liquid it didn't blend completely smooth in my blender, and harder bits of gelatin in my gummies are no good in my opinion. So I would recommend making the full recipe. If you have two candy molds that should work out about perfectly. If not, just pour the extra in a dish to set up. It won't be as cute but still tasty.

Recipe to make kosher ten commandment gummies | Land of Honey

Strawberry Lemonade Gummies
2/3 cup strawberries (I used frozen but fresh works too)
2/3 cup lemon juice
5 tablespoons kosher gelatin (I used Great Lakes which is kosher and grass fed)
Ten commandments candy mold

Over medium heat in a small sauce pan combine your berries and lemon juice. Cook gently for 3-5 minutes until berries are softened. Place in the blender and blend until smooth. If you want to do a taste test this is the point to do it. If it's not sour enough to your liking add an extra tablespoon of lemon juice. If it's too sour add a few strawberries or a spoonful of honey.
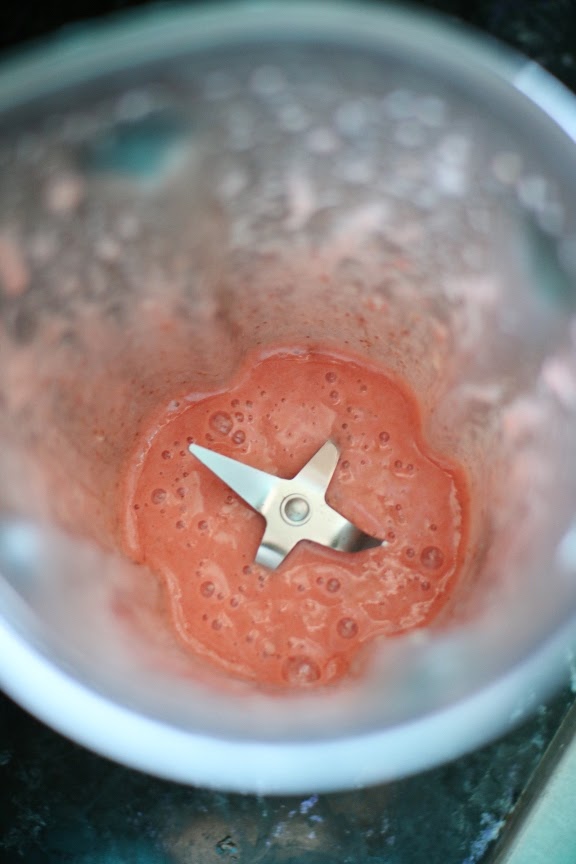
Once you are happy with the taste add the gelatin and blend until smooth. At this point, it is going to smell a little, uh, meaty and that's okay. I promise the smell and funkiness will go away once the gummies are set.
Pour into your ten commandments mold. If you see any large air bubbles you can poke them with a toothpick. Any extra can be poured into a ramekin or small baking dish to set.
Refrigerate one hour or until set. Use a toothpick or butter knife to loosen the tablets from one side of the mold and then peel them out. You're done!

Recipe for kosher sour gummies | Land of Honey

Blueberry Rhubarb Gummies
2/3 cup of blueberries (I used frozen but fresh works too)
1/3 cup rhubarb juice (see below)
1/3 cup lemon juice
5 tablespoons kosher gelatin
Ten commandments candy mold

To make rhubarb juice: place approximately 1 cup of fresh or frozen rhubarb into a saucepan with 1 cup of water. Simmer 15 minutes or until the rhubarb loses it's color. Strain and use the liquid for this recipe.
Over medium heat in a small sauce pan combine your berries with the rhubarb and lemon juice. Cook gently for 3-5 minutes until berries are softened. Place in the blender and blend until smooth. If you want to do a taste test this is the point to do it. If it's not sour enough to your liking add an extra tablespoon of lemon or rhubarb juice. If it's too sour add a tablespoon or two of blueberries or a spoonful of honey.
Once you are happy with the taste, add the gelatin and blend until smooth. You can see adding the gelatin turns the mixture opaque.
Pour into your ten commandments mold. If you see any large air bubbles you can poke them with a toothpick. Any extra can be poured into a ramekin or small baking dish to set.
Refrigerate one hour or until set. Use a toothpick or butter knife to loosen the tablets from one side of the mold and then peel them out. You're done!

Recipe for kosher sour gummies | Land of Honey

Grape Juice Gummies
1-1/3 cups grape juice
5 tablespoon kosher gelatin
Ten commandments candy mold

You don't need a blender for this one. Whisk your gelatin into 2/3 cup of grape juice. Meanwhile bring the other 2/3 cup of juice to a simmer. Whisk the heated juice into the gelatin mixture until smooth.
Pour into the mold and let set in the refrigerator about one hour until hardened.
Use a toothpick or butter knife to loosen the tablets from one side of the mold and then peel them out. You're done!

Recipe to make kosher ten commandment gummies | Land of Honey

I think this might be a new Shavuot tradition at my house. Has anyone used a ten commandment candy mold? I think I'm going to try chocolate next! :)

Recipe to make kosher ten commandment gummies | Land of Honey

Recipe for kosher sour gummies | Land of Honey

12 Ways to Celebrate the Feast of Unleavened Bread

Here's 12 ways you can celebrate the Feast of Unleavened Bread | Land of Honey
Pin It
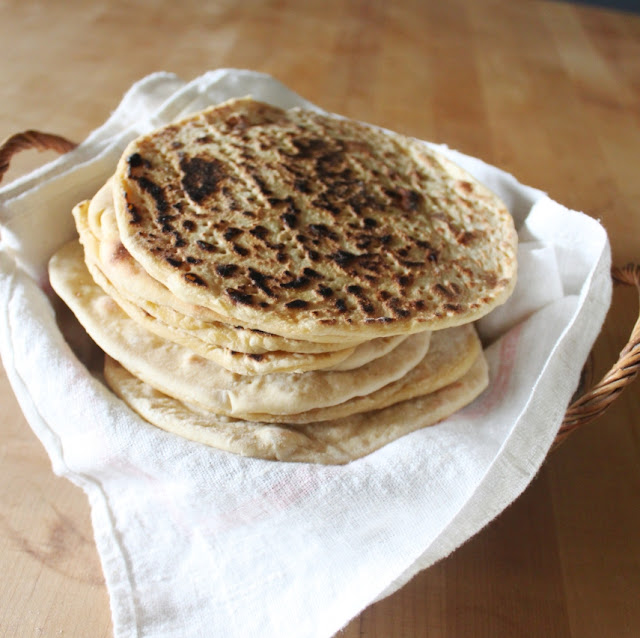
1. Bake matzah bread. I know the rabbinical rules to 'unleavened' can be a little intimidating but really what YHWH says is just to not let your bread rise or ferment. Making your own matzah is not difficult and it's SO MUCH BETTER than the boxed kind. Here's my recipe for matzah made with einkorn flour.
Einkorn matzah bread to celebrate the Feast of Unleavened Bread | Land of Honey

2. Read Scripture. This is something we desperately need to reclaim as a joy instead of drudgery. Read appropriate passages out loud, ask children to act them out, memorize a verse this week, or art journal. Our lives and special times will be so much better if YHWH's word is the cornerstone.
Scripture study during Matzah Week | Land of Honey

3. Make a matzah pinata. Isn't little Lior who made his own mini matzah pinata the cutest? Here are my directions for this super fun Unleavened Bread Week decoration and tradition. Maybe the kids could smash it and get out the goodies at the end of the week?
DIY Matzah Pinata | Land of Honey

4. Wear something festive. This Yeshua is the afikomen tee is on sale, or you could wear this shirt! Grab a matzah tie, or even get your dog involved in the festivities with a bandana or collar. Matzah socks, anyone?
Matzah socks! Perfect for Passover | Land of Honey

5. Celebrate with a sweet kosher-for-Passover treat. Not baking with flour doesn't mean you can't enjoy a special dessert! Try these chocolate donuts,  or a mixed berry pavlova, or these walnut-crusted cherry tarts from Love and Lemons.
Sour cherry tarts with walnut crust - kosher for Passover | Land of Honey

6. Make a matzo house. Definitely the answer to the traditional gingerbread house. Decorate with fruit, nuts, or candy. Use frosting or peanut butter for the glue. Martha Stewart shows us how.

7. Get your omer counter ready to go. You can make your own or print one of, but either way counting fifty days to get to Shavuot is a commandment of YHWH. Last year I did a DIY flair one that was such fun to put together. Torah Sisters Magazine also has the prettiest printable cards to use and a kids counter, and both are free!
DIY Flair Count the Omer calendar | Land of Honey

8. Watch a movie. From The Prince of Egypt to Exodus: Gods and Kings to The Ten Commandments to shorter kids movies there is a fair amount of media that portrays the Exodus story, albeit not usually in a 100% Scripturally accurate way. I find visual aids very helpful, but of course use discernment about what media you consume and be ready to fact check and discuss discrepancies with your fellow movie goers. Here is a children's cartoon on the Israelites leaving Egypt that you can watch for free.

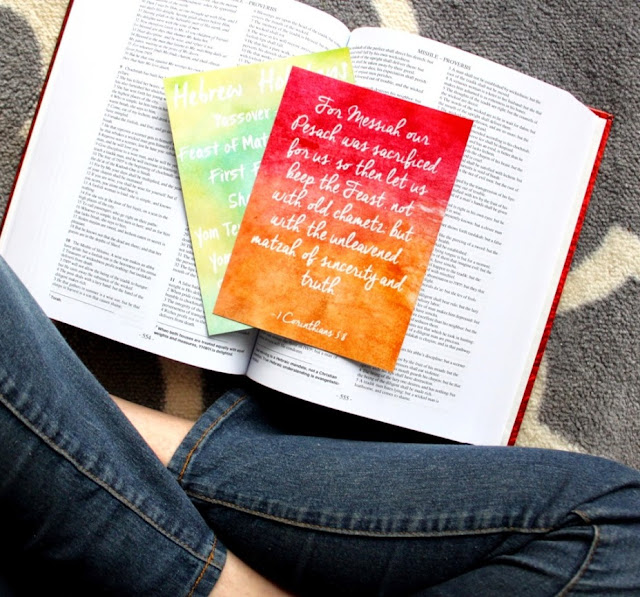
9. Decorate with a printable. 1 Corinthians 5:8 should be central to our focus during the Feast of Unleavened Bread, so print it off as a reminder. Lots of other Feast appropriate printables can be found here.
Scripture study during Matzah Week | Land of Honey

10. Clay matzos. I showed you how to make these last week. Use them for jewelry, barettes, doll houses, as flair for your omer calendar, magnets, or to decorate an inexpensive picture frame with. 
Make your own clay matzo jewelry to celebrate Unleavened Bread | Land of Honey

11. Send a card. Receiving cards in the mail was always a marker of a special time to me as a child. Use this chag sameach card from The Climbing Tree or make your own. Sending to friends and family who also celebrate the Feast is fun for all, and sending to those who don't celebrate can be a thoughtful gesture that you're thinking of them.
Printable Chag Sameach cards for Passover and Unleavened Bread | Land of Honey

12. Invite someone to dinner. This is special and memorable. Serve unleavened bread and maybe one or two of these recipes. This simple brunch is a huge crowd pleaser with cream cheese, smoked salmon, and cucumbers on fresh matzah. Discuss the meaning of the Feast and how it pertains to Yahusha to introduce your guests to this aspect of the kingdom.
Perfect brunch during Matzo Week | Land of Honey

How will you be celebrating Matzah week?

Here's 12 ways you can celebrate during Matzah Week | Land of Honey

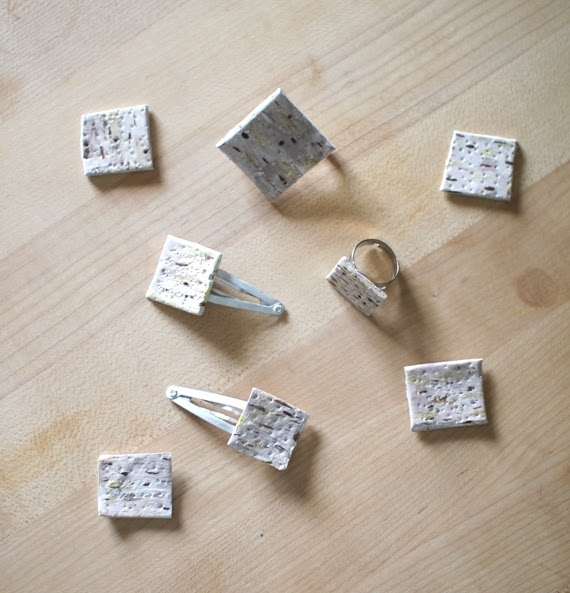
DIY Clay Matzah Jewelry

Here's an easy craft you can make to celebrate the Feast of Unleavened Bread.
DIY Clay Matzah Jewelry - cute craft to celebrate Passover | Land of Honey

Pin It
You will need:
air dry clay
paint - I used brown, white, and yellow acrylic
rolling pin
knife
fork
hot glue gun
plain pin back, barrettes, and ring

Step one: roll out your clay. How much depends on how many matzah pieces you'd like to end up with. I used about a golf ball sized piece of clay and wound up with 15 matzos. Roll to about quarter-inch thickness.
DIY Clay Matzo - Passover and Unleavened Bread craft | Land of Honey

Step two: decide what size you'd like to your matzahs to be. I cut mine into roughly one inch squares, with a few bigger ones for pins. Use your knife to cut out squares. A pizza cutter might also work well. You can be as perfectionist or not as you'd like.
DIY Clay Matzo - Passover and Unleavened Bread craft | Land of Honey

Step three: this is a fun part! Lightly press your fork onto each piece several times to give it that matzah texture. The holes need not go all the way through the clay and the end product will be sturdier if they don't. 
DIY Clay Matzo - Passover and Unleavened Bread craft | Land of Honey

If you'd like to use your matzahs to make a necklace with, now would be a good time to poke a hole so you can string it up later.

Step four: let your matzah squares dry out. Mine were good to go the next day, but yours may vary depending on thickness and the type of clay you use. Just wait for them to be completely dry before the next step. It shouldn't take more than a few days!
DIY Clay Matzo - Passover and Unleavened Bread craft | Land of Honey

Step five: when your squares are dry, it's time to paint. I mixed brown and white paint to make a shade of tan, and then used yellow and more of the dark brown, going for the golden brown look of matzah.
DIY Clay Matzo - Passover and Unleavened Bread craft | Land of Honey

I started off with painting the squares tan, then adding small specks of the dark brown and splotches of yellow. This helps to mimic the speckled look of traditional matzah. If you're not happy with how one looks, just paint over it and try again!
DIY Clay Matzo - Passover and Unleavened Bread craft | Land of Honey

Step six: I'm sorry but you'll have to wait one more time for these to dry. Mine were okay after a couple hours.

Once they are dry, congratulate yourself. You just made clay matzahs!
DIY Matzah ring for Passover and Unleavened Bread | Land of Honey
Step seven: grab your jewelry backs and hot glue gun. I painted the barrettes cream before hot gluing on the matzah, but other than that, just decide which direction you'd like your pieces to go and hot glue them into place.
DIY Matzah ring for Passover and Unleavened Bread | Land of Honey

Now you have matzah jewelry! Pretty easy, wasn't it?
DIY Matzah hair clips for Passover and Unleavened Bread | Land of Honey

There are many other things you can do with with these matzah pieces too. Instead of gluing to a ring or barrette you could attach them to magnets. Leave them as is for Lego sized matzah. Put pushpins on the back for your Count the Omer Flair Calendar. I'm planning on getting a picture frame and gluing these matzos around the edges for a cute decoration for the Feast of Unleavened Bread.
DIY Clay Matzah Jewelry - cute craft to celebrate Passover | Land of Honey

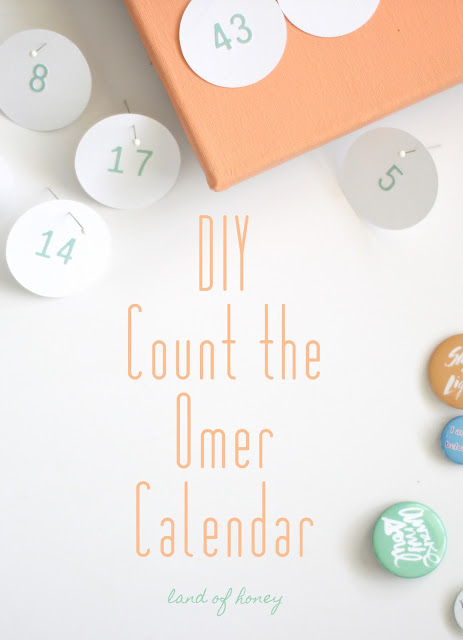
DIY Count the Omer Flair Calendar

How to Count the Omer + DIY Flair Calendar to count from Passover to Shavuot | Land of Honey

After Passover we are instructed to count fifty days to get to Shavuot.

And you shall count from the next day after the Shabbat, from the day that you brought the omer of wave offering; seven full weeks: until the next day after the last week shall you number fifty days, and you shall offer a new grain offering to YHWH. -Vayikra 23:25-26


DIY Count the Omer Calendar | Land of Honey

Pin It
Notice the use of the word 'you.' You shall count. Not let someone else count or just check the calendar to see when Shavuot falls. Count it out yourself.

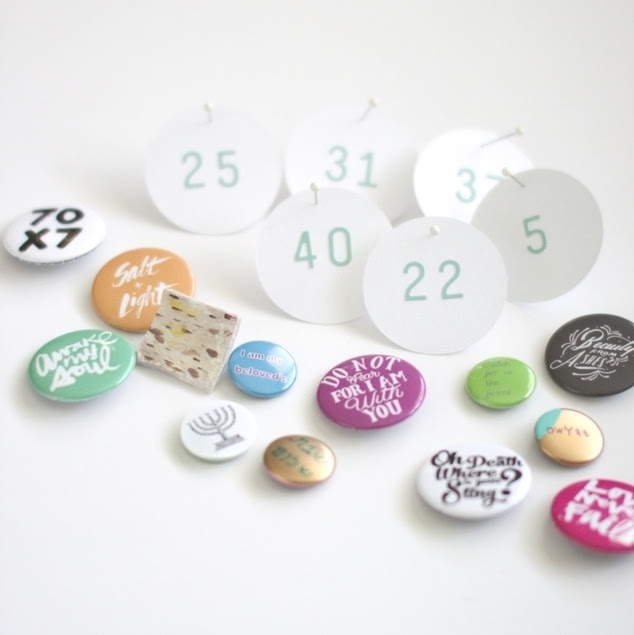
Scripture does not specify exactly how to do this. In the past I have done a simple crossing off in my planner and I have also used Kosher on a Budget's printable calendar. You don't have to use a written count, paperchain, etc. The important thing is that you do it. This year I made a counting calendar to make it a little more fun. I also thought it would be a good use for some of the flair I have, uh, accumulated over the years. I've worked at summer camps and in the music industry; I have a decent collection of buttons, okay? Time to put them to work.


DIY Count the Omer Calendar | Land of Honey

You will need:
-canvas, mine was 20" by 16"
-paint in your colors of choice
-letters to trace
-2 inch cut out circles (if you use a different canvas size, adjust accordingly)
-number stickers
-pushpins
-flair
DIY Count the Omer Calendar | Land of Honey

Step 1: Paint your canvas the color of your choice and let dry.
Step 2: Once that's ready to go trace your letters on the top to say 'Count the Omer' or Sefirat Ha'Omer.

Step 3: Paint in your letters. If you mess up, no big deal you can always, paint back over it with your background color if needed.
DIY Count the Omer Calendar | Land of Honey

Step 4: Put your number stickers on your cut out circles. This is one of those simple but tedious tasks where it's nice to talk to a friend or listen to a teaching. You could also write the numbers on with markers if you'd rather.

DIY Count the Omer Calendar | Land of Honey

Step 5: Space your circles evenly on the canvas and use push pins or straight pins to hold them in place.

Step 6: Add a piece of flair underneath each and you're done!
DIY Count the Omer Calendar | Land of Honey


What to use for flair?
-buttons
-stickers
-clay matzah
-beads or charms from jewelry (a menorah or a Shema piece would be perfect!)
-small patches
-handwritten Scriptures


DIY Count the Omer Calendar | Land of Honey

Each day remove one of the number circles (they need a better name), to display more and more flair as we get closer to Shavuot! I'm excited to use this calendar this year! How will you count the omer?


DIY Count the Omer Calendar | Land of Honey

PS - Sources for flair include Walk in Love, they have so many beautiful things, and Petite Paperie, who makes the lovely menorah stickers. Some are handmade, including the clay matzah, and others were acquired long ago.

Healthy Autumn Recipes

Biblically Clean Fall Recipes: Healthy Dishes for Autumn Inspired by Biblical Dietary Laws

Here are Biblically clean recipes for the fall harvest season! I love the abundant produce at this time of year and these recipes take advan...